
Goals: Experiment with new mediums in traditional film after researching to gain an understanding of how artists before you have used this unique and often unpredictable medium.

Nadia Brecl – HRHS 2014
Project Introduction: Experience an alternative type of photography using a “Lomography” camera called a Holga. With much less photographic control students will need to be more open-minded and experimental with this new medium. It can be a lot of fun but unpredictability is the name of this game. You learn through experience not simply knowing what to do correctly.
Remember: All Epic Design Quests require documentation of your design process in sketchbooks. Be sure you are very familiar with the design process before beginning any Epic Quest.

Create your new project page titled Holga. Now copy the following as you will need to complete and correctly document these 7 steps on the your design process:
- Understand the Problem
- Research and Investigate
- Generate Possible Solutions
- Select AND DEVELOP Best Solution
- Model and Prototype (Create)
- Test and Evaluate
- Produce
- Experience
- Experiment
- Produce
- Problem Solve new challenges
- Approach an new unknown open-minded
- Create at Least One digitally scanned negative from Holga 120mm film
PROJECT REQUIREMENTS & INSTRUCTION
Design Process STAGE 1: UNDERSTAND THE PROBLEM
1. Consider what the goal of your design is: this is likely done through research as you need to know what HOLGA is.
- What is a Holga?
- Why have you been assigned this project?
Design Process STAGE 2: Research and Investigate
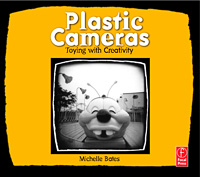
This great book is available on our bookshelf for reference.
Always record every resource either as a cited source or a linked resource with documentation on your project page.
2. Research information topic thoroughly
- How does it work?
- What makes it unique?
- What special effects have other photographers done using Holgas?
Watch these videos (and others you find in your research)
OPTIONAL but helpful
Design Process STAGE 3: Brain Storm ideas for your images
How could use the uniqueness that the Holga camera offers to create something new and different?
What kind of subject matter will allow you to be experimental or create an interesting raw image?
Are then any different non traditional techniques that you could do with this camera? lots of info online about manipulating what you can do with a holga for shooting.
Design Process STAGE 4: Select and Develop Best Solution
There is much less planning with a first roll or two as you need to begin to understand the outcomes before you plan out what to expect from your shoots
Design Process STAGE 5: Model and Prototype (Create)
6. Begin production of your design
-
-
- Shoot and develop at least 3 rolls (develop one before beginning to shoot the next) of 120 film on a Holga camera
- Scan at least two Negatives from each roll
- Develop negative digitally as necessary
- cropping
- exposure
- explore varied manipulations of the contrast and details
- color/tone (color grading is common)
-
Design Process STAGE 6: Test and Evaluate
7. Evaluate your results
-
-
- Evaluate your negatives and digital images
- How could you improve the results?
- Could you or should you reshoot another roll?
- Ask others for their opinions and document the suggestions whether you agree with them or not.
-
Design Process STAGE 7: Produce
8. Turn in the 3 final .JPG’s and get them Printed
-
-
- Turn file into the Coulson’s server
- Get final printed
- Finalize Project Page with Self-Reflection
- successes
- struggles
- improvements
- what you learned
- Fill out Evaluation sheet
-
COMPLETE: You need a fully finished project page included all scanned sketchbook work with captions. Turn your your finished artwork to the Captain’s Server. Finally Paste the URL to your project page below and you may then click complete.